Showing posts with label AccuQuilt. Show all posts

November 7, 2022

Deck Your Halls With AccuQuilt!

For the past few years, I've had the wonderful opportunity to create with AccuQuilt products to design projects and write patterns and blog posts. During the month of November, AccuQuilt GO! Getters are sharing some fun project ideas to help you Deck Your Halls for the holidays!

Today I'm sharing a tutorial for a cute and easy tree ornament. I don't do much decorating for the holidays, but I do love putting up our Christmas tree each year. It's always fun to see the ornaments we have collected over the years with some of my favorite being the handmade treasures my son made in preschool and elementary school. I also like purchasing ornaments during trips and vacations as a reminder of our time together.

Making your own ornament is a fun project. Since all the sewing is done by hand, it's a great opportunity to relax and create during the hectic holiday season.

Supplies:


Step 1:
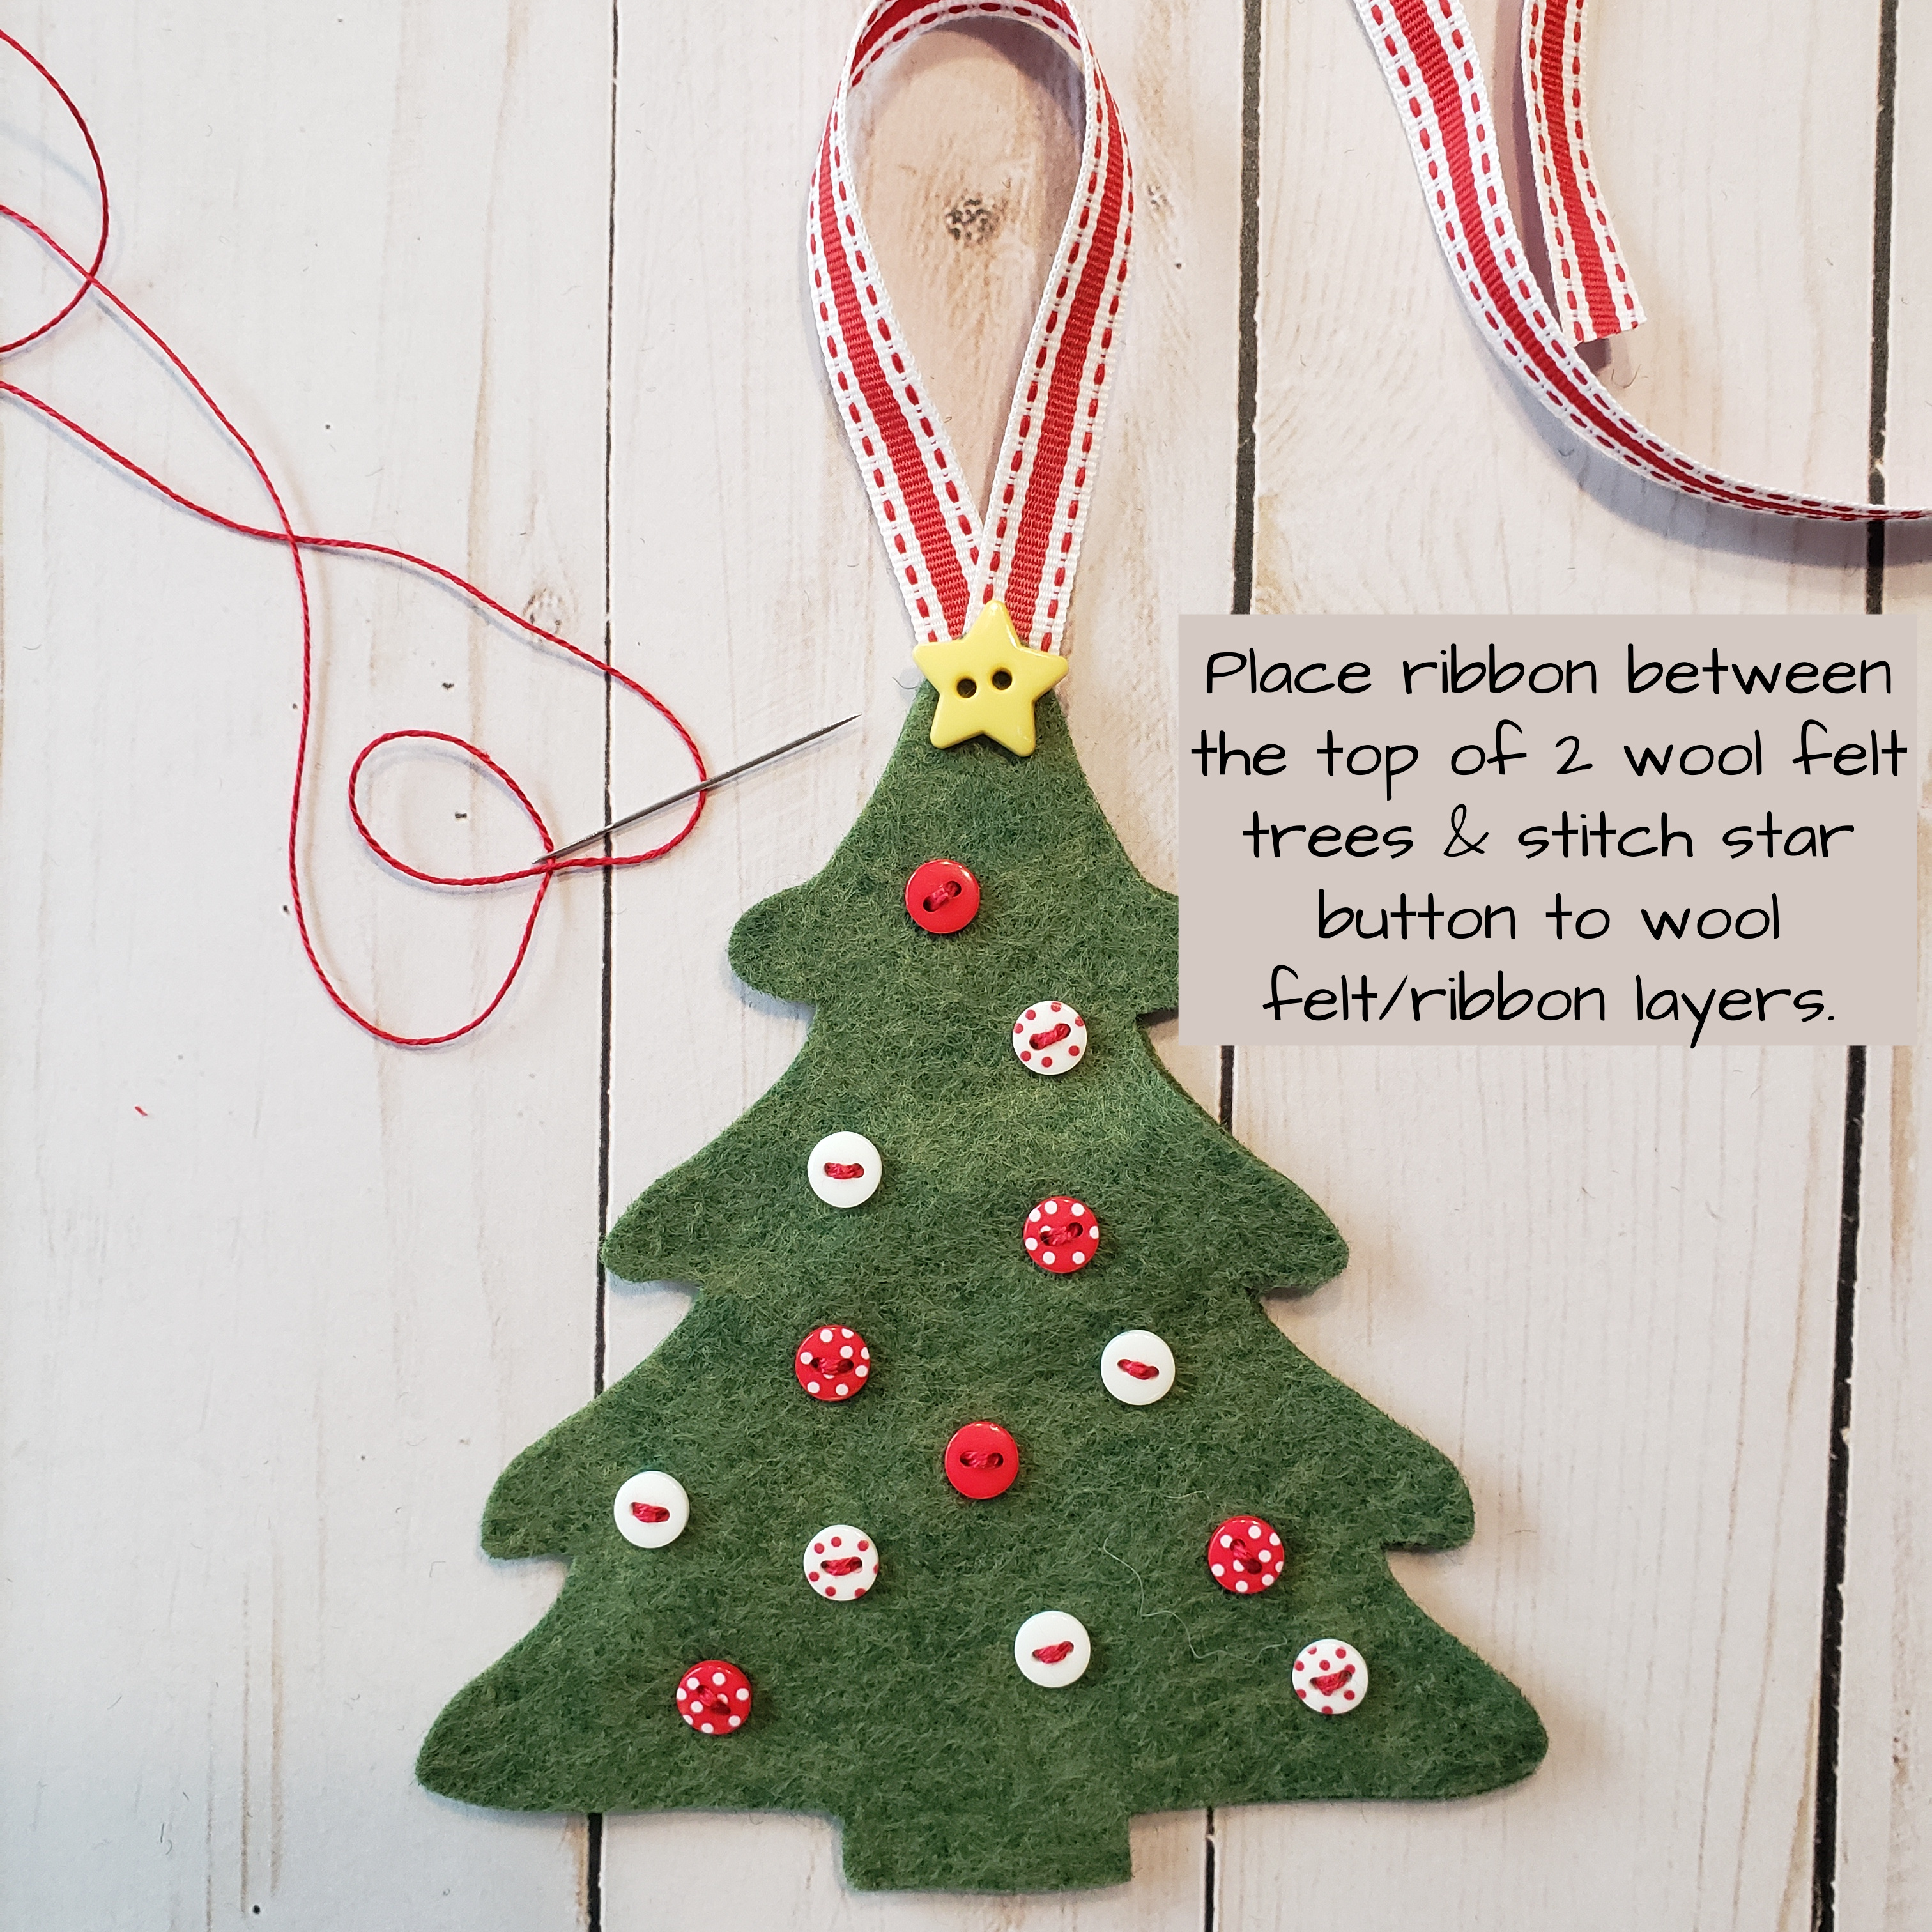
For each ornament, you will need to tree shapes cut from the wool felt. Using perle cotton thread and a chenille or embroidery needle, sew the mini buttons to one of the felt trees.


Step 2:
Fold a piece of ribbon (approximately 7" long) in half to create a hanging loop. Place the ends of the ribbon between the 2 wool felt tree layers. Sew a star button to the top of the tree to secure the ribbon between to tree layers.


Step 3: Use a running stitch to sew the 2 wool felt tree layers together.


Step 4: Before stitching is complete, lightly stuff the tree with poly-fil.


Step 5: Finish stitching, and your ornament is complete!


In addition to adorning your tree, these can also be used as a fun package topper in place of a bow. If you make an ornament like this, I'd love to see it! Post it on Instagram and be sure to tag me (@stephjacobsondesigns) and AccuQuilt (@accuquilt) so we can see your creations.

April 22, 2022

Covering the World: One Quilt at a Time

This post contains affiliate links.

Hello and welcome! Today it's my turn to share the quilt (top) I made for Covering the World: One Quilt at a Time. (I spent so long writing up this post and tutorial I didn't get my top quilted yet!) In 2022, AccuQuilt, Moda Fabrics and Baby Lock are partnering in this pay-it-forward campaign. Moda and AccuQuilt designers (like me!) will make and donate one quilt a week to a charity of their choice to support this campaign. 

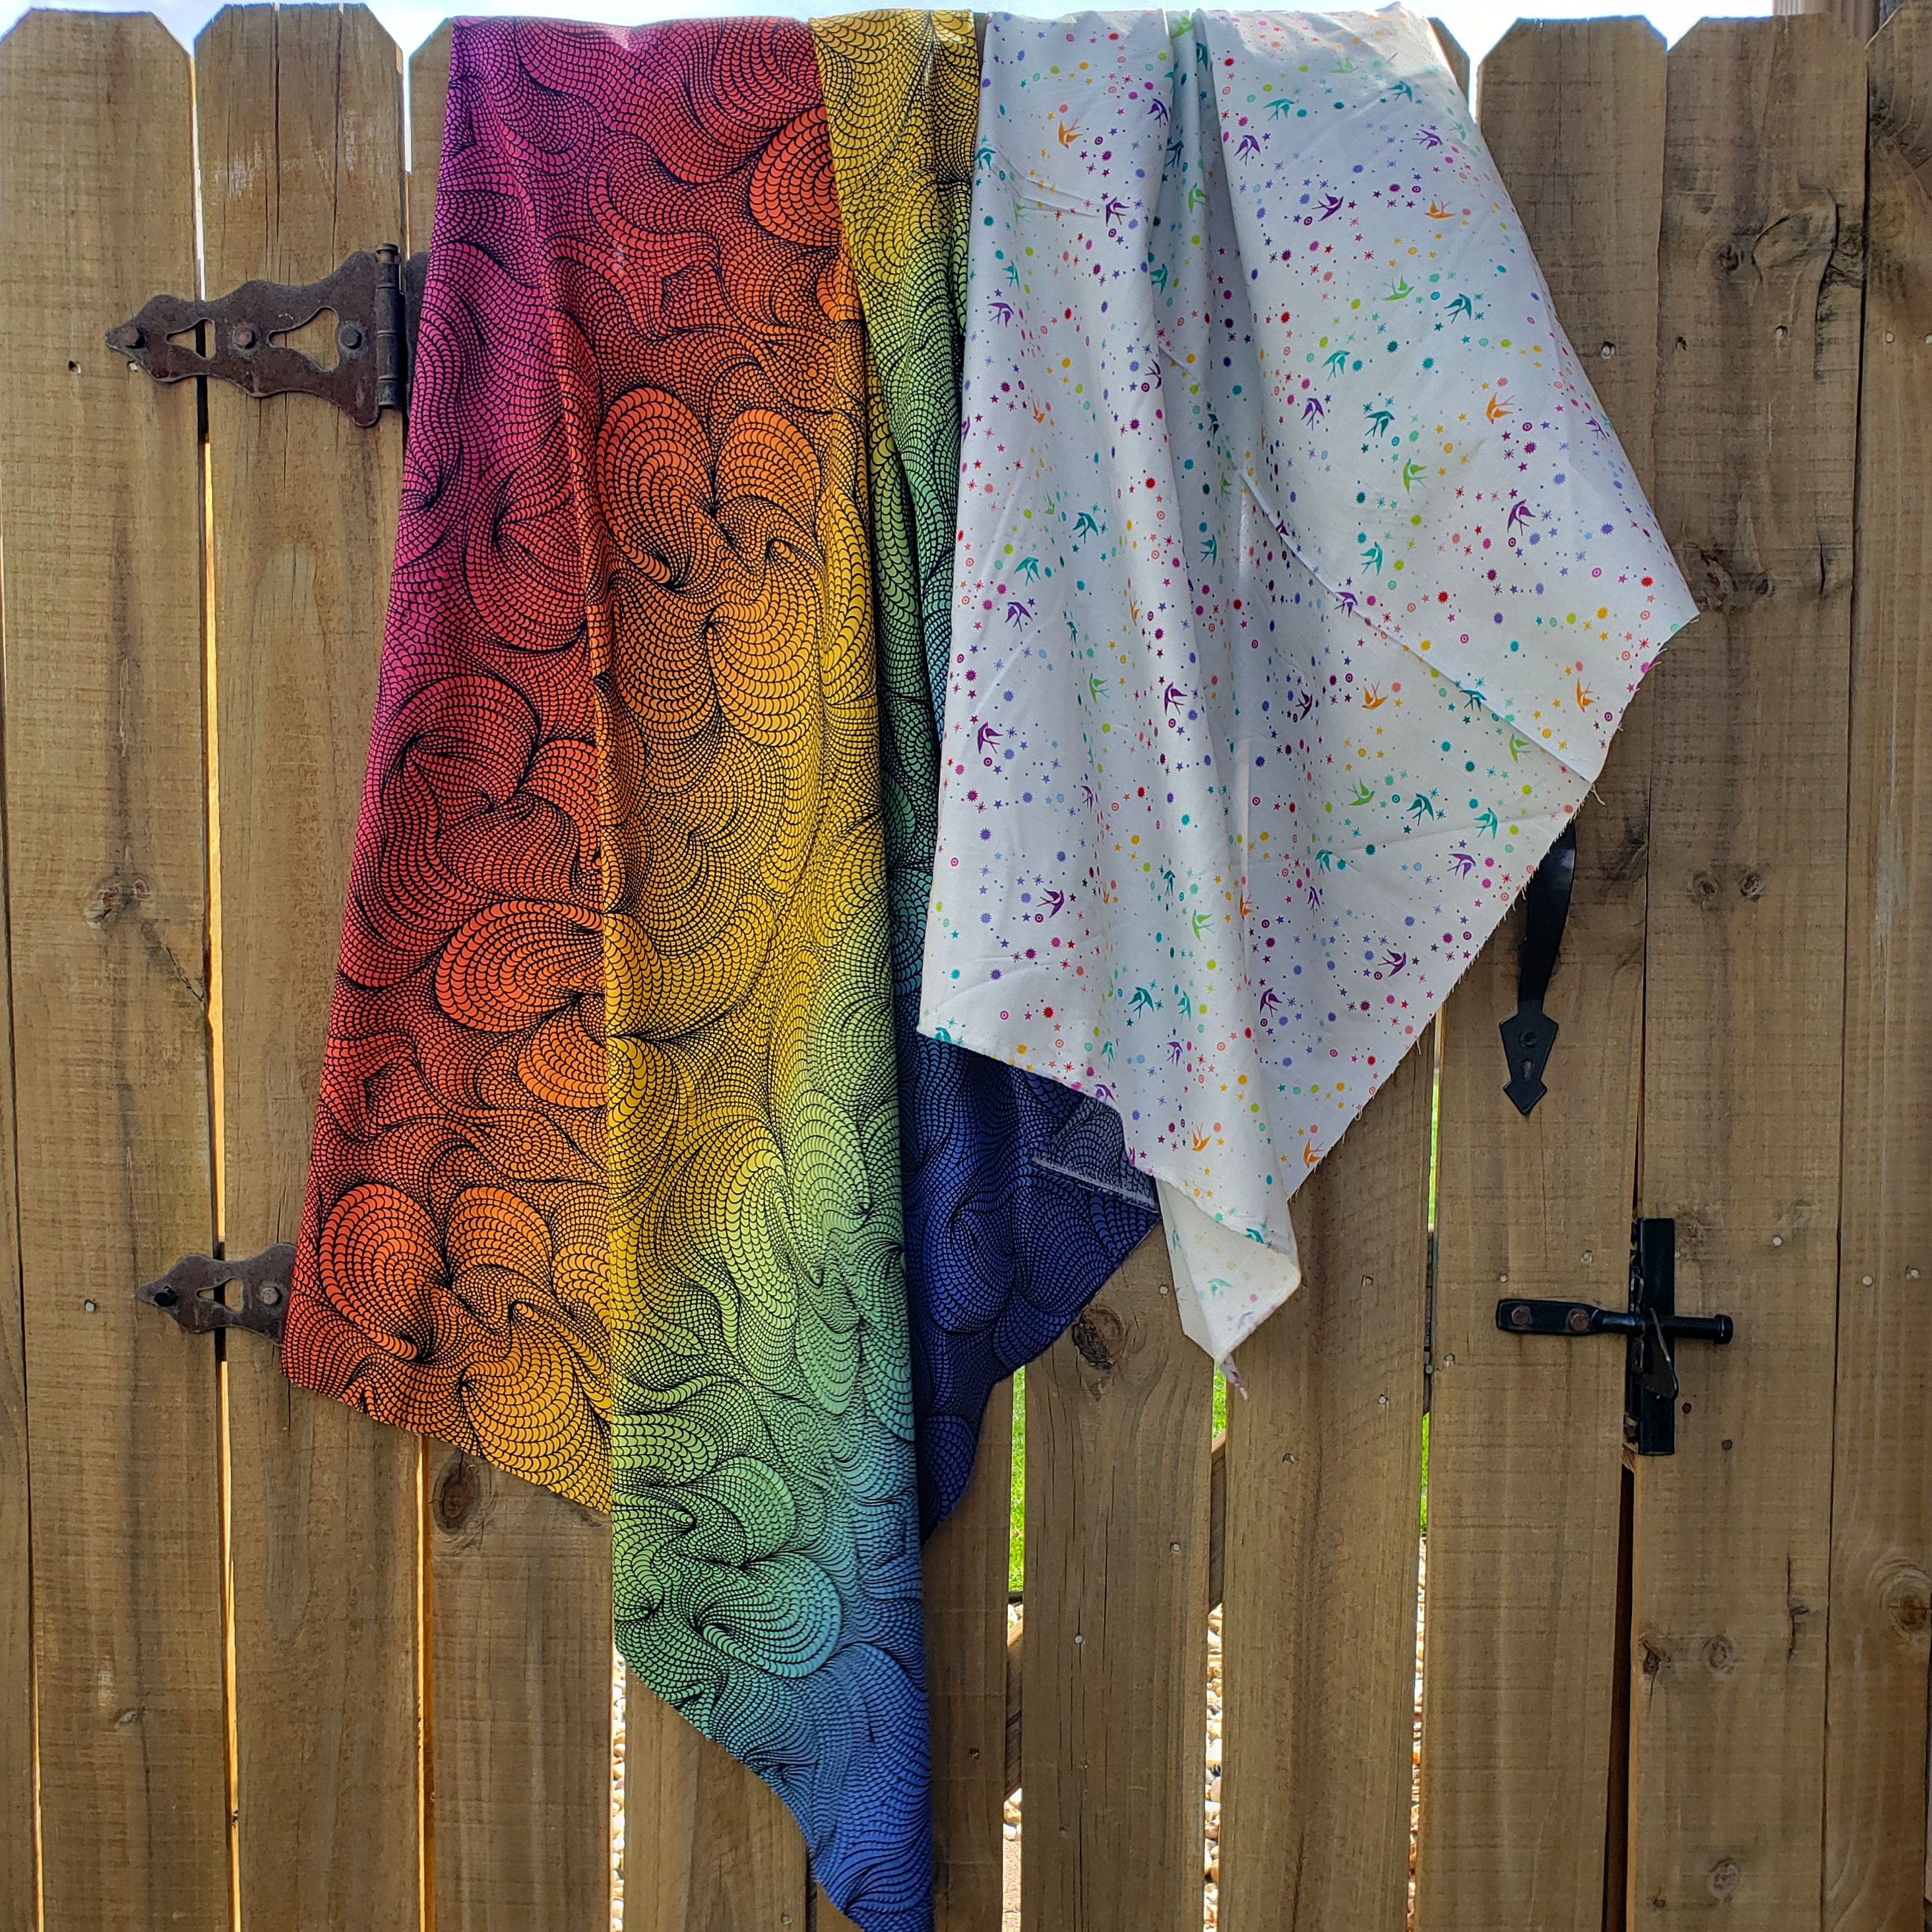
For those of you that know me, you know I love creating quilts with half square triangles. For my Covering the World quilt, I designed a fun and colorful patchwork heart quilt using half square triangles. To make fabric selection easy, I used Rainbow Bio - Multi fabric designed by Adrienne Leban for FreeSpirit Fabrics which paired perfectly with Fairy Dust - Whisper by Tula Pink for the background.

freespirit rainbow fabric

The benefit of using a rainbow or ombre fabric is you get multiple coordinating colors and patterns to create a cohesive patchwork rainbow by purchasing yardage!


Because I like to use BIG HST blocks to make quick quilts, and this quilt finished at 48" square.

Dies Used:

Fabrics:
  • Free Spirit Rainbow Bio - Multi (or other rainbow ombre fabric) - 1-1/2 yards
  • Fairy Dust - Whisper (or other background fabric) - 1 yard
  • Binding - 1/2 yard
  • Backing - 3 yards (for pieced backing)
  • Batting - 54" x 54"
Cutting:

Rainbow Fabric:
  • Cut rainbow fabric into 6 strips (parallel to selvedge) approximately 7-1/4" wide. (Plan this out before you start cutting! Since most quilting fabric is 42" to 44" wide, there isn't any extra room for miscuts.)

  • Stack the 6 strips on top of one another and cut 40 6-1/2" HSTs
Background Fabric:
  • Cut 3 - 7-1/2" strips using rotary cutter
    • Cut 2 - 6-1/2" HSTs from one end of each of the strips
    • Trim remainder of strips to 6-1/2" using 6-1/2" strip die
  • Cut 1 - 6-1/2" strips using 6-1/2" strip die
    • Cut 2 - 6-1/2" squares from end of the strip
  • Trim 6-1/2" strips to 24-1/2" lengths
Binding Fabric:
  • Cut 5 - 2-1/2" strips

Sewing: Use 1/4" seam allowance and press seams open.
  • Sew 40 HST blocks using the rainbow fabric

  • Sew 12 HST blocks using the rainbow fabric and background fabric

  • Sew the center heart sections by sewing the HST blocks and 2 background squares together as shown in the diagram. 

  • Add 2 of the background borders to the right and left sides of the heart block. Sew a HST to each end of the remaining 2 background border strips. Sew to the top and bottom of the heart block.

  • Sew 6 rainbow HSTs together in a row. Repeat to make a second row. Sew to right and left sides of quilt.
  • Sew 8 rainbow HSTs together in a row. Repeat to make a second row. Sew to top and bottom of quilt.

Quilt, bind and donate!

I will be donating my soon-to-becompleted quilt to the Omaha Project Linus chapter. I have been making quilts for Project Linus since 2012 through my do. Good Stitches quilting circle. Project Linus is a volunteer organization with a mission to provide a sense of comfort to children who are seriously ill or traumatized through the gifts of new, handmade blankets, quilts and afghans crafted by volunteer “blanketeers.” All donations to the Omaha chapter of this nation-wide organization are given to seriously ill or traumatized children of the Greater Omaha and Council Bluffs area.

You can be a part of this big pay-it-forward campaign...and be entered to win some pretty wonderful prizes! You can find all the details on this AccuQuilt blog post. Together let's #QuiltTheWorld2022!

June 2, 2021

AccuQuilt Pickle Dish Die

As many of you know, I am a huge fan of the AccuQuilt die cutting system because it really is a huge time saver for me. This year, AccuQuilt has a new Die to Try program where a new die is released on the first Tuesday of each month.  The Die of the Month is available in limited quantities ONLY during the month it is released. (Now if you do miss out, you can vote to bring a die back!) Yesterday, the June die was releaed...the GO! Pickle Dish - 10" Finished Die!


I am very excited to try this die for a few reasons...

  1. I have always been intrigued by and want to make a Pickle Dish quilt, but I would never ever ever make it without a die. I simply do not have the patience or time to cut out, keep track of and sew all those pieces together. 
  2. While I am a modern quilter, I have a deep love for traditional quilts. I enjoy putting a modern spin on traditional patterns and cannot wait to make a "modern" version of  Pickle Dish quilt.
I haven't had a chance to use my new die yet, but I have been designing some possible layouts and colors schemes using Electric Quilt 8.


I think the black and white gives it a really graphic, more modern look. Version #2 is my favorite and the one I'll try first...with a pop of color where the small white squares are now.

What are your thoughts? Is the Pickle Dish die something you would use? If you do decide to try this die, there are some free Pickle Dish patterns available on the AccuQuilt website to get your started. You can also design your own project which is one of my favorite ways to use my AccuQuilt dies!

October 1, 2020

2020 Monthly Color Challenge {October}

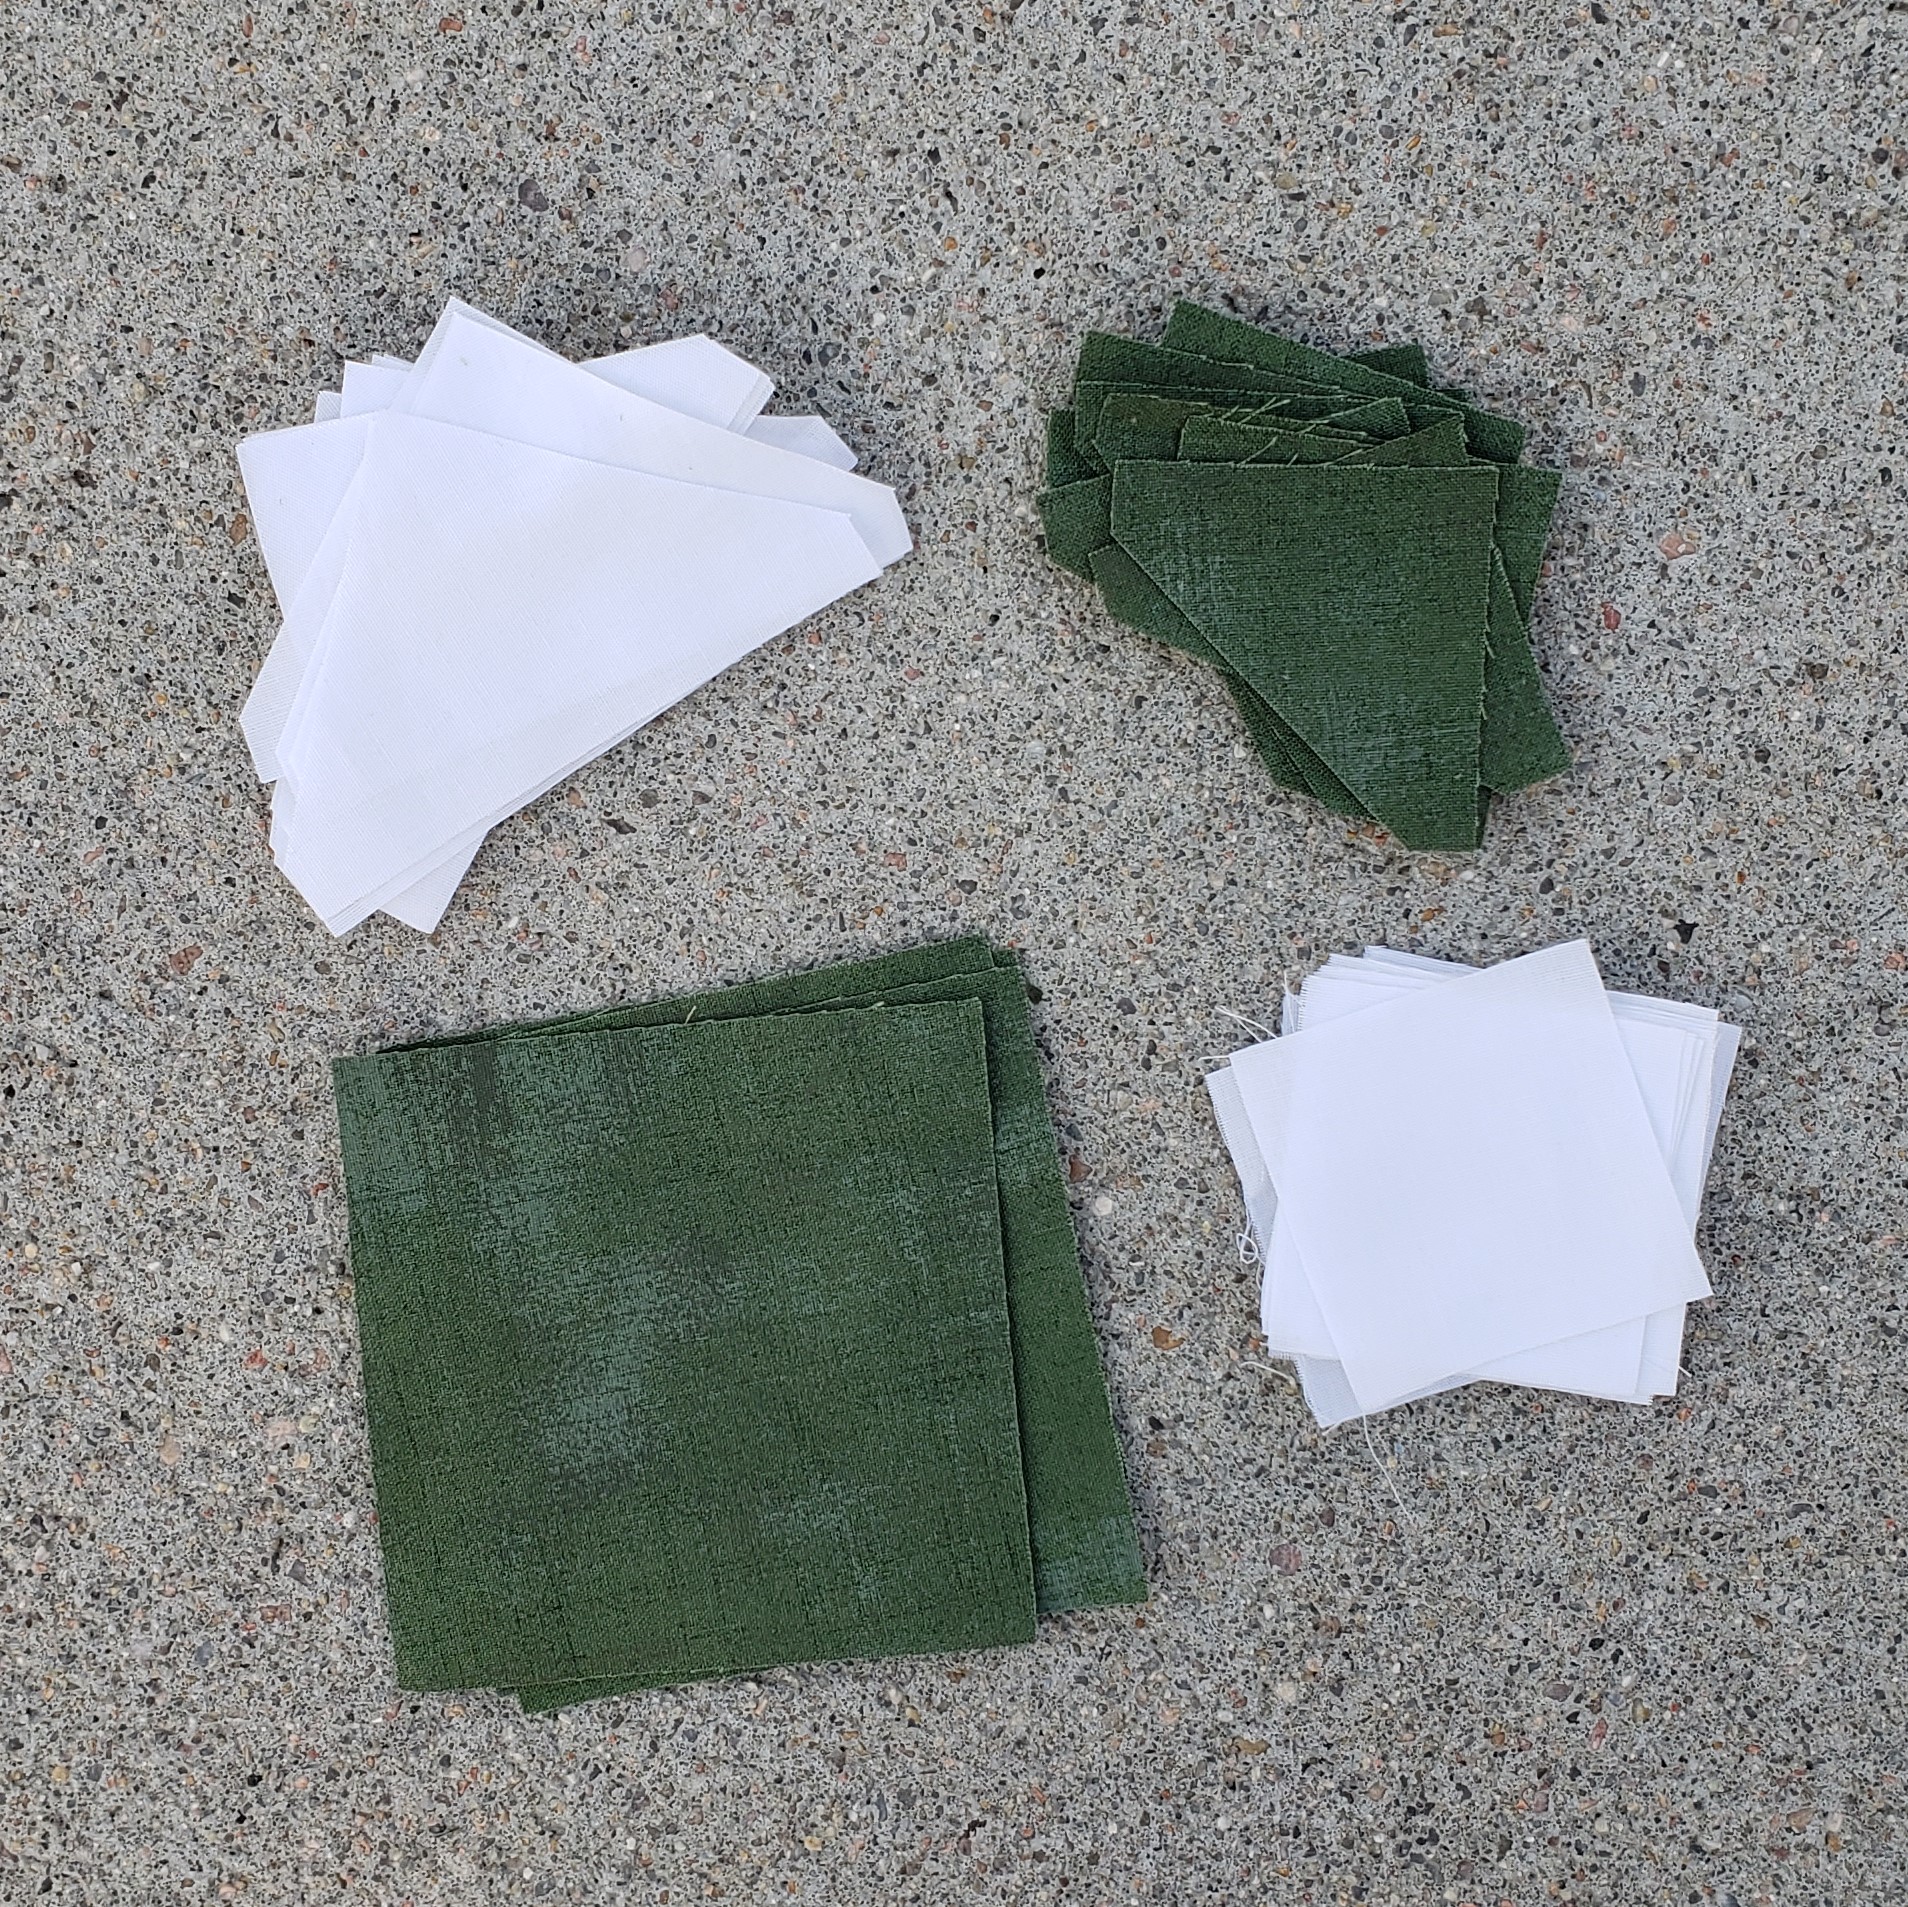
 It's October and my second block for the 2020 Monthly Color Challenge hosted by Patterns by Jen! Each month, Jen posts a free block pattern to be made in a particular color. The inspiration for the 2020 Monthly Color Challenge is "Birds." For October, the bird is the ruby-crowned kinglet, and the color is olive. I used a dark olive Moda Grunge paired with a solid white fabric. My favorite way to cut fabric for quilt blocks is using my AccuQuilt. The AccuQuilt 6" Qube has all the dies needed to cut the pieces for the October block, so this was a quick make. 


The block is made up of four identical adorable star blocks.


If you're just now finding out about Jen's 2020 Monthly Color Challenge, it's not too late to join in the fun! Each month's pattern is available as a free download curing the current month. If you miss a month, you can buy previous block patterns for just $1 each month. You can find all the 2020 Monthly Color Challenge blocks along with other great patterns in Jen's Payhip Shop. If you make the October block, be sure to link it up at Patterns by Jen for a chance to win some great prizes. This month brings a new group of amazing sponsors! (Click on each picture to check out the sponsors' websites.)


Be sure to visit the other July Color Challenge bloggers to see the beautiful blocks they made.

Roseanne of Home Sewn by Us

Thanks for stopping by, and happy sewing!

October 18, 2019

It's Trick-or-Treat Time!

I'm sharing a tutorial over on the AccuQuilt blog for a cute (and easy!) personalized trick-or-treat bag! Head on over to this post for all the details.


I made the bag for my adorable nephew, Hunter. Last year he was the Staypuft Marshmallow Man from Ghosbusters, and I think it's one of my cutest handmade costumes to date. I need to get going on this year's costume since Halloween is right around the corner. 


Handmade Halloween costumes have always been a favorite project of mine. Check out some of my costumes from past years. Thanks for stopping by!

April 29, 2019

Island Batik April 2019 {AccuQuilt Ready. Set. GO!}

The products featured in this post were given to me by Island BatikHobbs, AccuQuilt, and Aurifil.


April brought the first Island Batik industry partner spotlight challenge! This year, AccuQuilt generously provided all the Island Batik Ambassadors with the amazing Ready. Set. GO! Ultimate Fabric Cutting System. This starter set includes:


  • GO! Fabric Cutter
  • GO! Qube 8" Mix & Match Block
  • GO! Strip Cutter-2 1/2" (2" Finished)
  • GO! Cutting Mats: 6" x 6" and 10" x 24"
  • GO! Qube Book by Eleanor Burns
  • Die Pick
  • Over 70 free patterns!
For those that follow me on Instagram, you know that I love my AccuQuilt! This system allows me to quickly and accurately cut my fabric so I can spend more time designing and sewing. I enjoy creating with the AccuQuilt Qubes because I can randomly cut and sew my pieces, and I know they're going to work together. (Seriously...quilt math is not my forte!) For the April project, Ambassadors were asked to use AccuQuilt dies to make a baby quilt that is 40" to 48" square. 

AccuQuilt has a free download of 72 block patterns you can make with the Qubes. I couldn't decide on a block, so I looked through some of my Pinterest pins for ideas. (In addition to using my fabric stash, I'm also trying to make some of the many ideas I have pinned over the years.) I was drawn to a HST Block of the Month from February 2012 by Jeni Baker of In Color Order. I decided to use that block for my quilt but make flying geese instead of half-square triangles. I used die 3 (GO! Half Square Triangle-4" Finished Square) for the main part of the flying geese and die 5 (GO! Quarter Square Triangle-4" Finished Square) for the corners. I used a stash builder (roll of 5" strips) of bright fabrics in greens, purples and aquas and added in some Check It Out Hot Pink.


By cutting up to 6 layers at a time, the AccuQuilt really decreases the amount of time spent cutting. Having all the pieces cut and ready to go makes for some quick chain piecing. 


Before you know it, you're on your way to having a completed quilt top! I cut and pieced my quilt in my new studio, Happy Little Stitches. I've never really had room for a design wall at home, so it is wonderful having space to layout (and leave!) projects.


I quilted this on my APQS Lucey with the Papyrus pantograph from Urban Elementz. I just bought a 30-yard roll of Hobbs 80/20 Cotton/Poly batting, and I love how it quilts up. (There's going to be some amazing crinkle texture after this is washed!) I finished the binding with some hand stitching using 3 strands of Aurifil cotton floss (1148 Light Jade).


The completed quilt! Even though I used the 8-inch Qube, my blocks ended up about 11 inches because I used the half-square triangle die on point. The completed quilt is approximately 42 inches square. 


Thanks for stopping by! 

January 8, 2019

Island Batik Getaway Blog Hop!

The products featured in this post were given to me by Island Batik.


Welcome to my stop on the Island Batik Ambassadors Getaway Blog Hop! We're on day 2 of our travels, and I'm so happy you're making a stop at my blog. As Island Batik Ambassadors, we get two huge boxes filled with gorgeous Island Batik fabrics, Hobbs batting, and Aurifil thread. There's always a package of beautifully-wrapped fabric marked "SURPRISE!" that is *not* to be revealed until the specified release date. (And it's always sooo hard to keep a secret when pretty fabric is involved!) I was absolutely thrilled when I opened my package to find the "Ditty" fabric line.


One of my favorite things to do with pretty, coordinating fabrics is to cut it up using my AccuQuilt Go! and randomly sew the pieces back together. I decided to sew some curves and used the AccuQuilt Drunkards Path die (#55740, dies 11 & 12) from the Go! Qube Mix & Match 12" Companion Set. I cut 42 pieces each of the inner and outer curves and was able to quickly cut the pieces needed for a baby quilt.


When sewing my blocks together, I randomly paired up fabrics. I decided not to assemble my blocks into a traditional Drunkard's Path but instead oriented each 6-inch block the same way.


This quick and easy quilt is a perfect little baby quilt. It measures 36" x 42". (I sometimes wonder if this is too small for a baby quilt since kiddos grow so fast, but I think it's the perfect size for dragging around for many years.)


I quilted this on my AQPS Lucey using the Gatsby pantograph from Urban Elementz. I quilted it so the curves in the panto went the opposite direction from the curves in the pieceing, and I think it adds some interest to the quilt.


The backing is Island Batik Batter, and I used my AccuQuilt Go! to cut 2.5 inch binding strips for a scrappy binding.


This happy little quilt is a baby gift for a former pharmacy student of mine. She just had a baby girl in December, and I'm sure it will be well-loved.

This is only day 2 of the Island Batik Getaway Blog Hop, and there's a full itinerary on the Island Batik website! Be sure to check out all the Island Batik Ambassador blog posts for great giveaways. Island Batik is also giving away a rainbow of 20 fat quarters of Island Batik Basics.

To celebrate our Island Batik Getaway, I'm giving away a 5-inch charm pack (42 squares) of the Ditty fabric line cut with my AccuQuilt Go! To enter, just leave a comment below telling me your favorite go-to baby quilt pattern (if you have a link to a pattern, even better!) or what you would make with the Ditty charm pack. If you are a no-reply blogger, please leave an email address so I can contact you if you win. My giveaway is open for one week, and I'll draw a winner at approximately 9pm CST on Tuesday, January 15. Thanks for stopping by and good luck!

EDITED TO ADD: My giveaway will remain open through Sunday, February 3 and I will select *two* random winners to each receive a Ditty charm pack. The two random winners will be contacted by Tuesday, February 5.

August 31, 2018

The Island Batik Great Outdoors Blog Hop!

The products featured in this post were given to me by Island Batik.

Aaaah the great outdoors. We’re seeing more and more research that says spending time outside is good
for your mental health. (A lot like quilting, in that way!) So, on those days when it’s just too hot to fire up the
iron and sewing machine, we say get outside and have fun walking, tending to your garden, or just basking in
the glorious (hot) sun!


The great outdoors are what inspired this hop’s theme. Throughout the month of August, our Ambassadors
will be featuring Island Batik’s newest fabrics, appearing on shop shelves SOON! See something you like?
Ask for it at your local quilt shop, or request it if you don’t yet see it. We have the most delicious collections to
share with you!


One of the fun things about being an Island Batik Ambassador is being able to sew and create with a fabric
line before it has been released. When I opened my "Surprise!" package of fabric from the box we
received in January, I had received the Spirit Rhythm collection.
To be honest, this is not a fabric line I would have chosen for myself as I tend to gravitate towards brighter,
more rainbow-colored fabrics. Another great thing about being an IB Ambassador is the opportunity to do
things outside my comfort zone. Afterlorking with these fabrics, I've grown to love the deep, rich colors and
the graphic, geometric patterns. Because I wanted the focus to be on the fabrics, I decided to use my HST
Building Blocks plan using AccuQuilt 6.5 inch (6 inch finished) half-square triangles. (If you live in the Omaha/Lincoln area, I'm teaching this workshop at Calico House in Lincoln on Saturday, Sepember 29!)


I was able to use all the fabrics from the Spirit Rythm collection and paired them with an Island Batik neutral I found at my local quilt shop. 


I pieced the back and used  a black and cream stripe for the binding. I used a "Seagrass Braid" edge-to-edge pantograph from Urban Elementz.


I was hoping to get some better quilt pictures using the beautiful Lake of the Wood as the backdrop, but it was
too windy today. Fortunately I have a wonderful husband that helped me get some pictures to share!


Giveaway!

***ETA: Giveaway is closed!***

Check out this Island Batik blog post for the complete hop schedule and a giveaway from Island Batik.
Each blogger is also having a giveaway so there's lots of great prizes to be won! For my giveaway, I'm
going to send one winner a flat-rate envelope filled with some of the wonderful fabric I've been given
by Island Batik. To enter, just leave a comment below telling me your favorite handmade gift to make
and give. If you have links to patterns or tutorials, even better! (Christmas is coming, and I need ideas!)
I will randomly choose one comment on Wednesday, September 5, 2018 after I get home from work
(approximately 9pm CST). Good luck and thanks for stopping by!